system("git remote add origin git@github.com:JoFrhwld/new-page.git
git branch -M main
git push -u origin main")Setting up a Quarto project repository
The first thing to do is to set up a github repository with your quarto project in it. You can do this 1 of two ways:
Option 1: Use the page template
Step 1: Make a new repo based on the template
url: https://github.com/A-S500/page-template
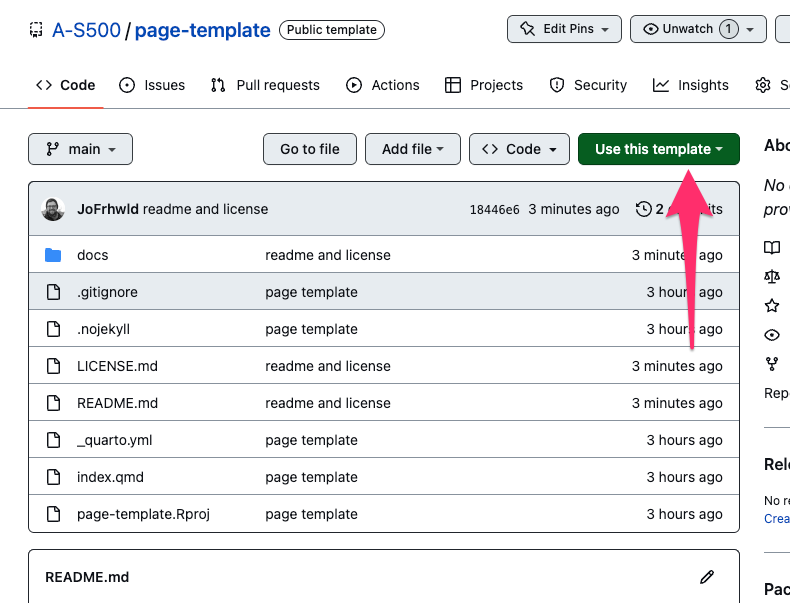
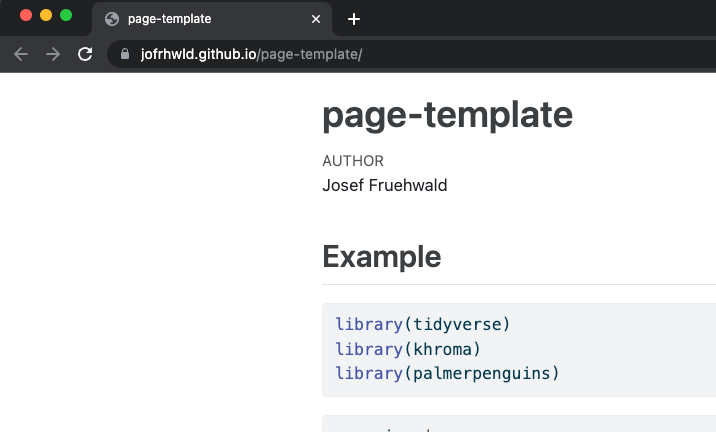
The url of the site you’re making will be https://{USERNAME}.github.io/{REPOSITORY_NAME}/ , so when creating the repo, give it a name you’ll like.
Step 2: Create your RStudio project
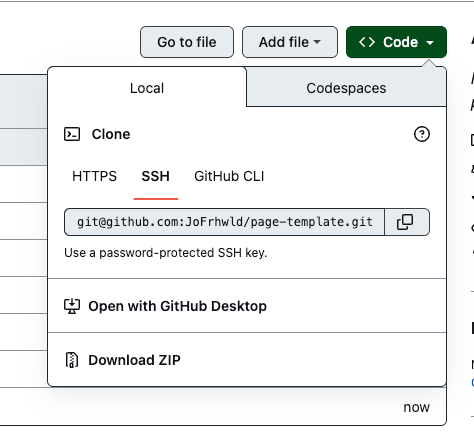
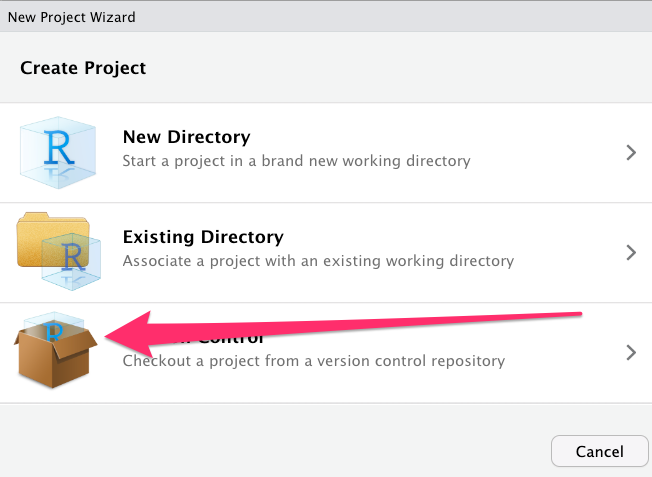
Option 2: Make it from scratch
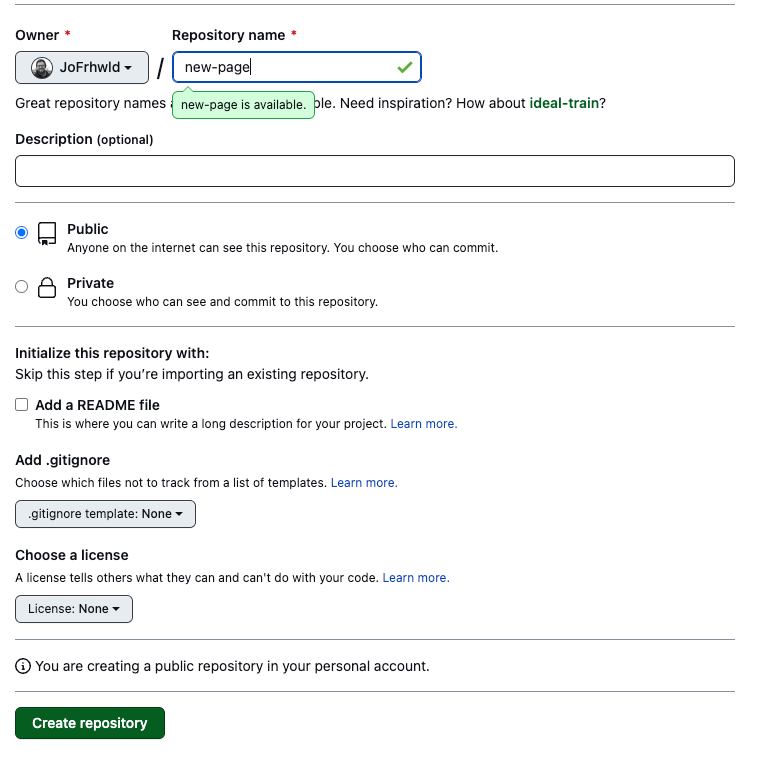
Step 1: Create a new, empty, github repository
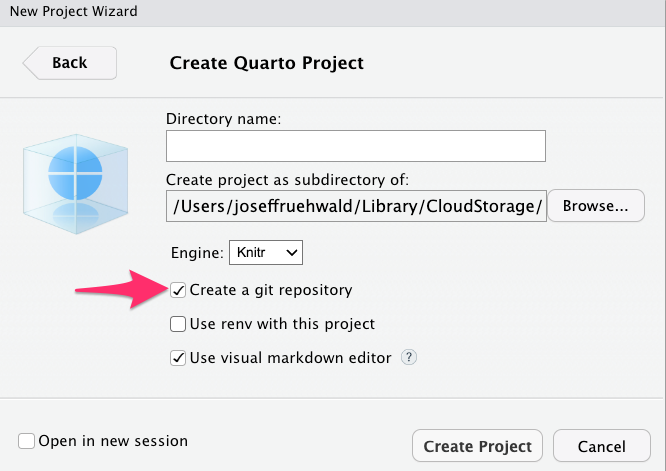
Step 2: Create a new R project
Make sure you tick “Create a git repository
Step 3: Commit the current files in the project in Git
Step 4: Run the suggested code from the git repository inside system()
Important things to have in your project
Inside _quarto.yml
Make sure to tell quarto to render outputs to a directory called docs.
project:
  title: "page-template"
  output-dir: docs/
index.qmd
The page that holds the main content for the site should be called index.qmd.
.nojekyll
This is a little annoying, but your repository should also have a file called .nojekyll. It doesn’t need to contain anything, it just needs to be there.
A README
A README.md document is there to remind yourself what this project & repository is for, and to explain it to others who find the repo.
A license
A license in your repository is there to tell others how they can use, re-use, and modify your code. Some licences are very permissive (e.g. MIT). Others require that when people modify your code, they have to make their modifications publicly available under the same terms you originally distributed them.
Render Locally & Push
To render the page “locally” (that is, on your own computer or on RStudio Server) in the “Build” tab in RStudio, click on “Render Project”.
After you’ve rendered the project, .html pages should appear in the docs/ directory. Commit everything and push it to github.
Deploy from github
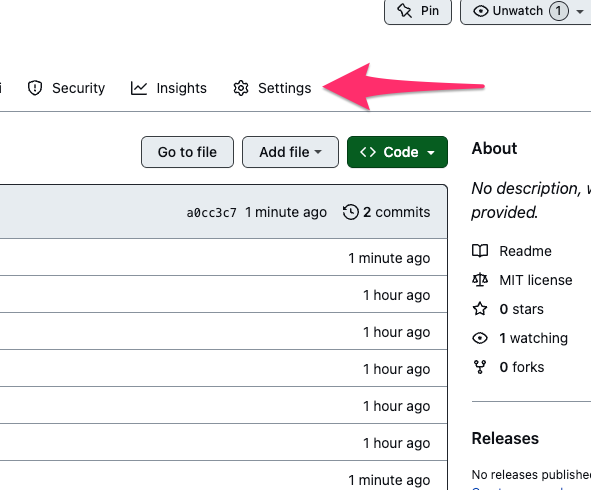
Go to the “⚙️Settings” tab in your repository.
On the left menu, go to “Pages”

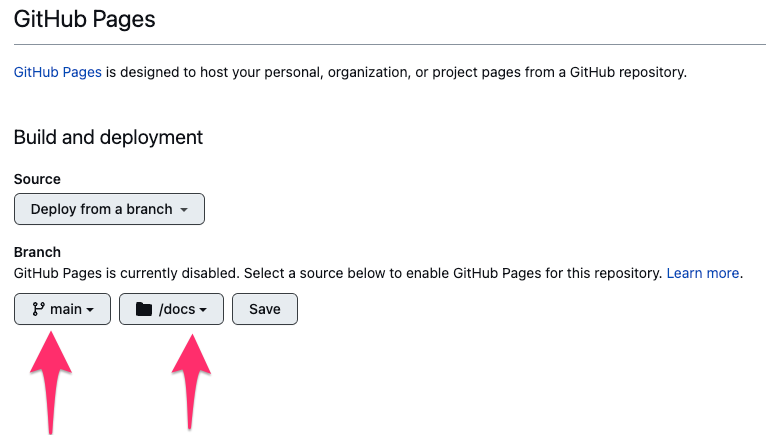
Choose the “main” branch and “docs” directory to deploy from, and hit “save”.
Bask
Congratulations, after giving github a minute or two of processing time, you’ll have a github page!
