Instruction boxes with should be done on github, and instruction boxes with should be done in RStudio.
Step 1: Create a Github Account
Go over to Github and create a free account.
As suggested in Happy Git Chapter 4, it would make sense to register an account username that aligns with your professional identity.
After you’ve created your free account, if you are affiliated with a university, I would also suggest applying for the education benefits here: https://education.github.com/. There are a few nice, but not mandatory, perks.
Step 2: Configure Git in RStudio
Now, you need to tell Git a little bit about yourself on the computer/server you’re using RStudio on.
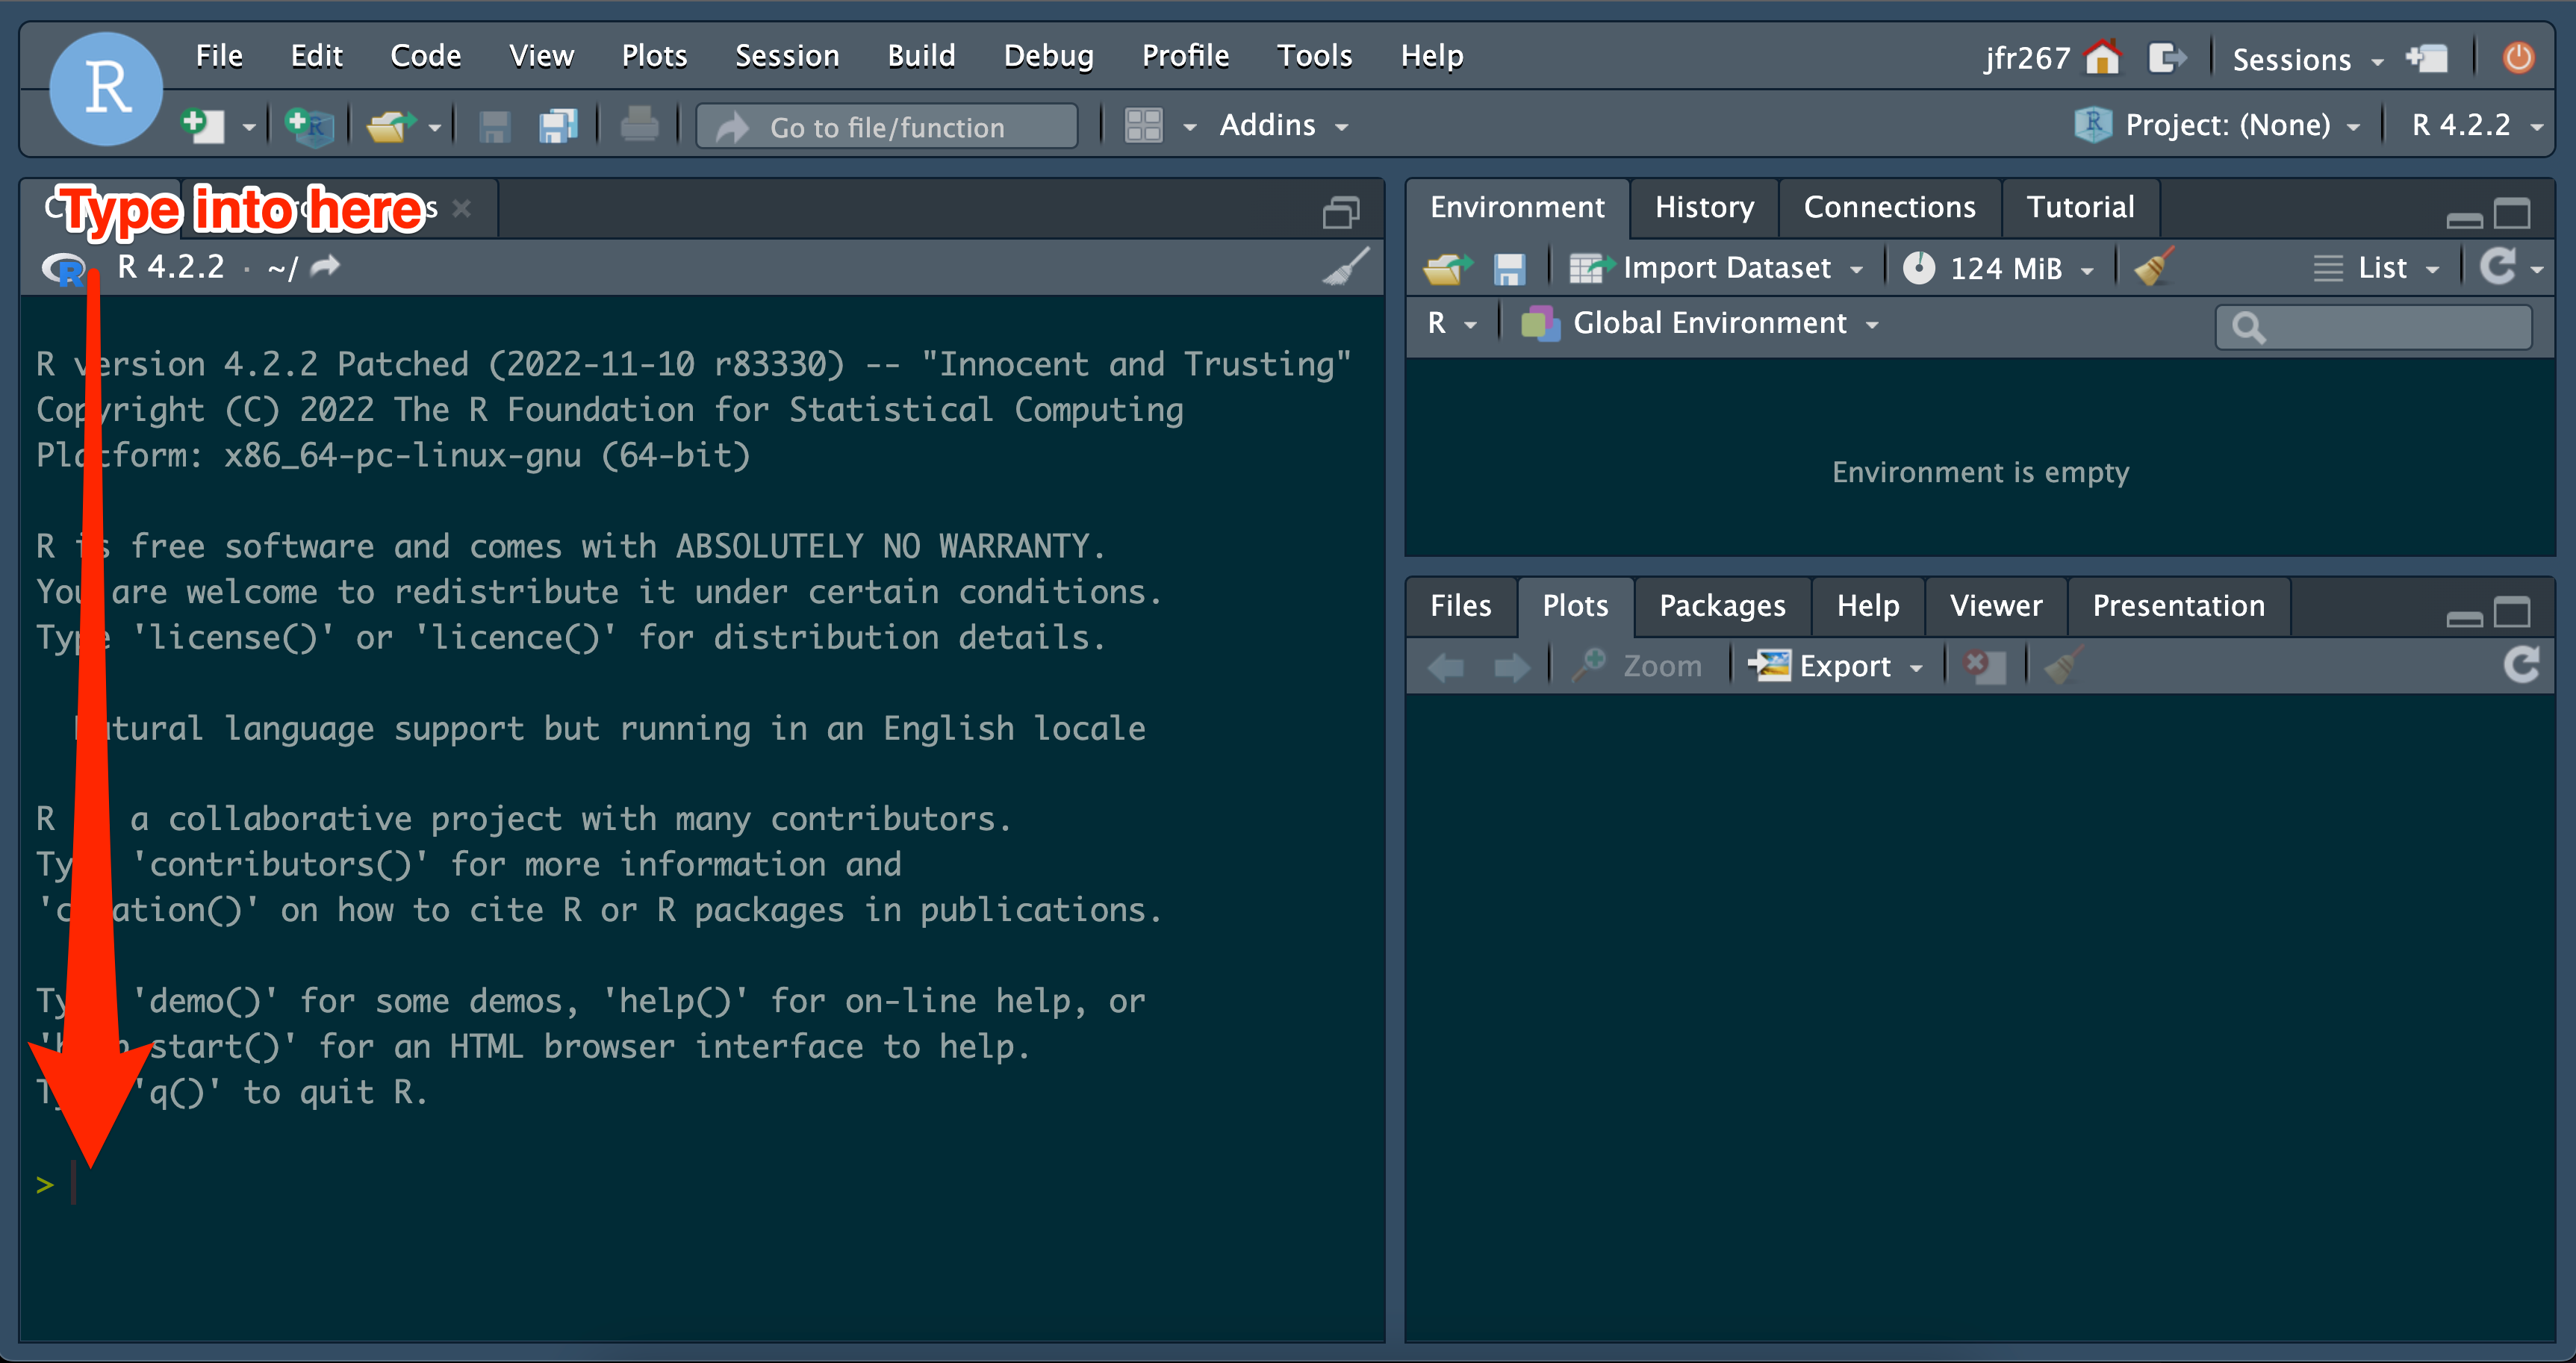
Next, we need to tell the local version of Git who you are, specifically your username (which should match your Github username) and your email address (which should match the email address you registered for Github with).
Step 3: Configure RStudio to Communicate with Github
In order to be able to push commits from RStudio to Github, you’ll need to set up secure communication between wherever you are using RStudio and Github. I’ll walk you through how to do this with SSH credentials. (See also Happy Git with R for personal access tokens via HTTPS).
RStudio Configuration
- Go To:
-
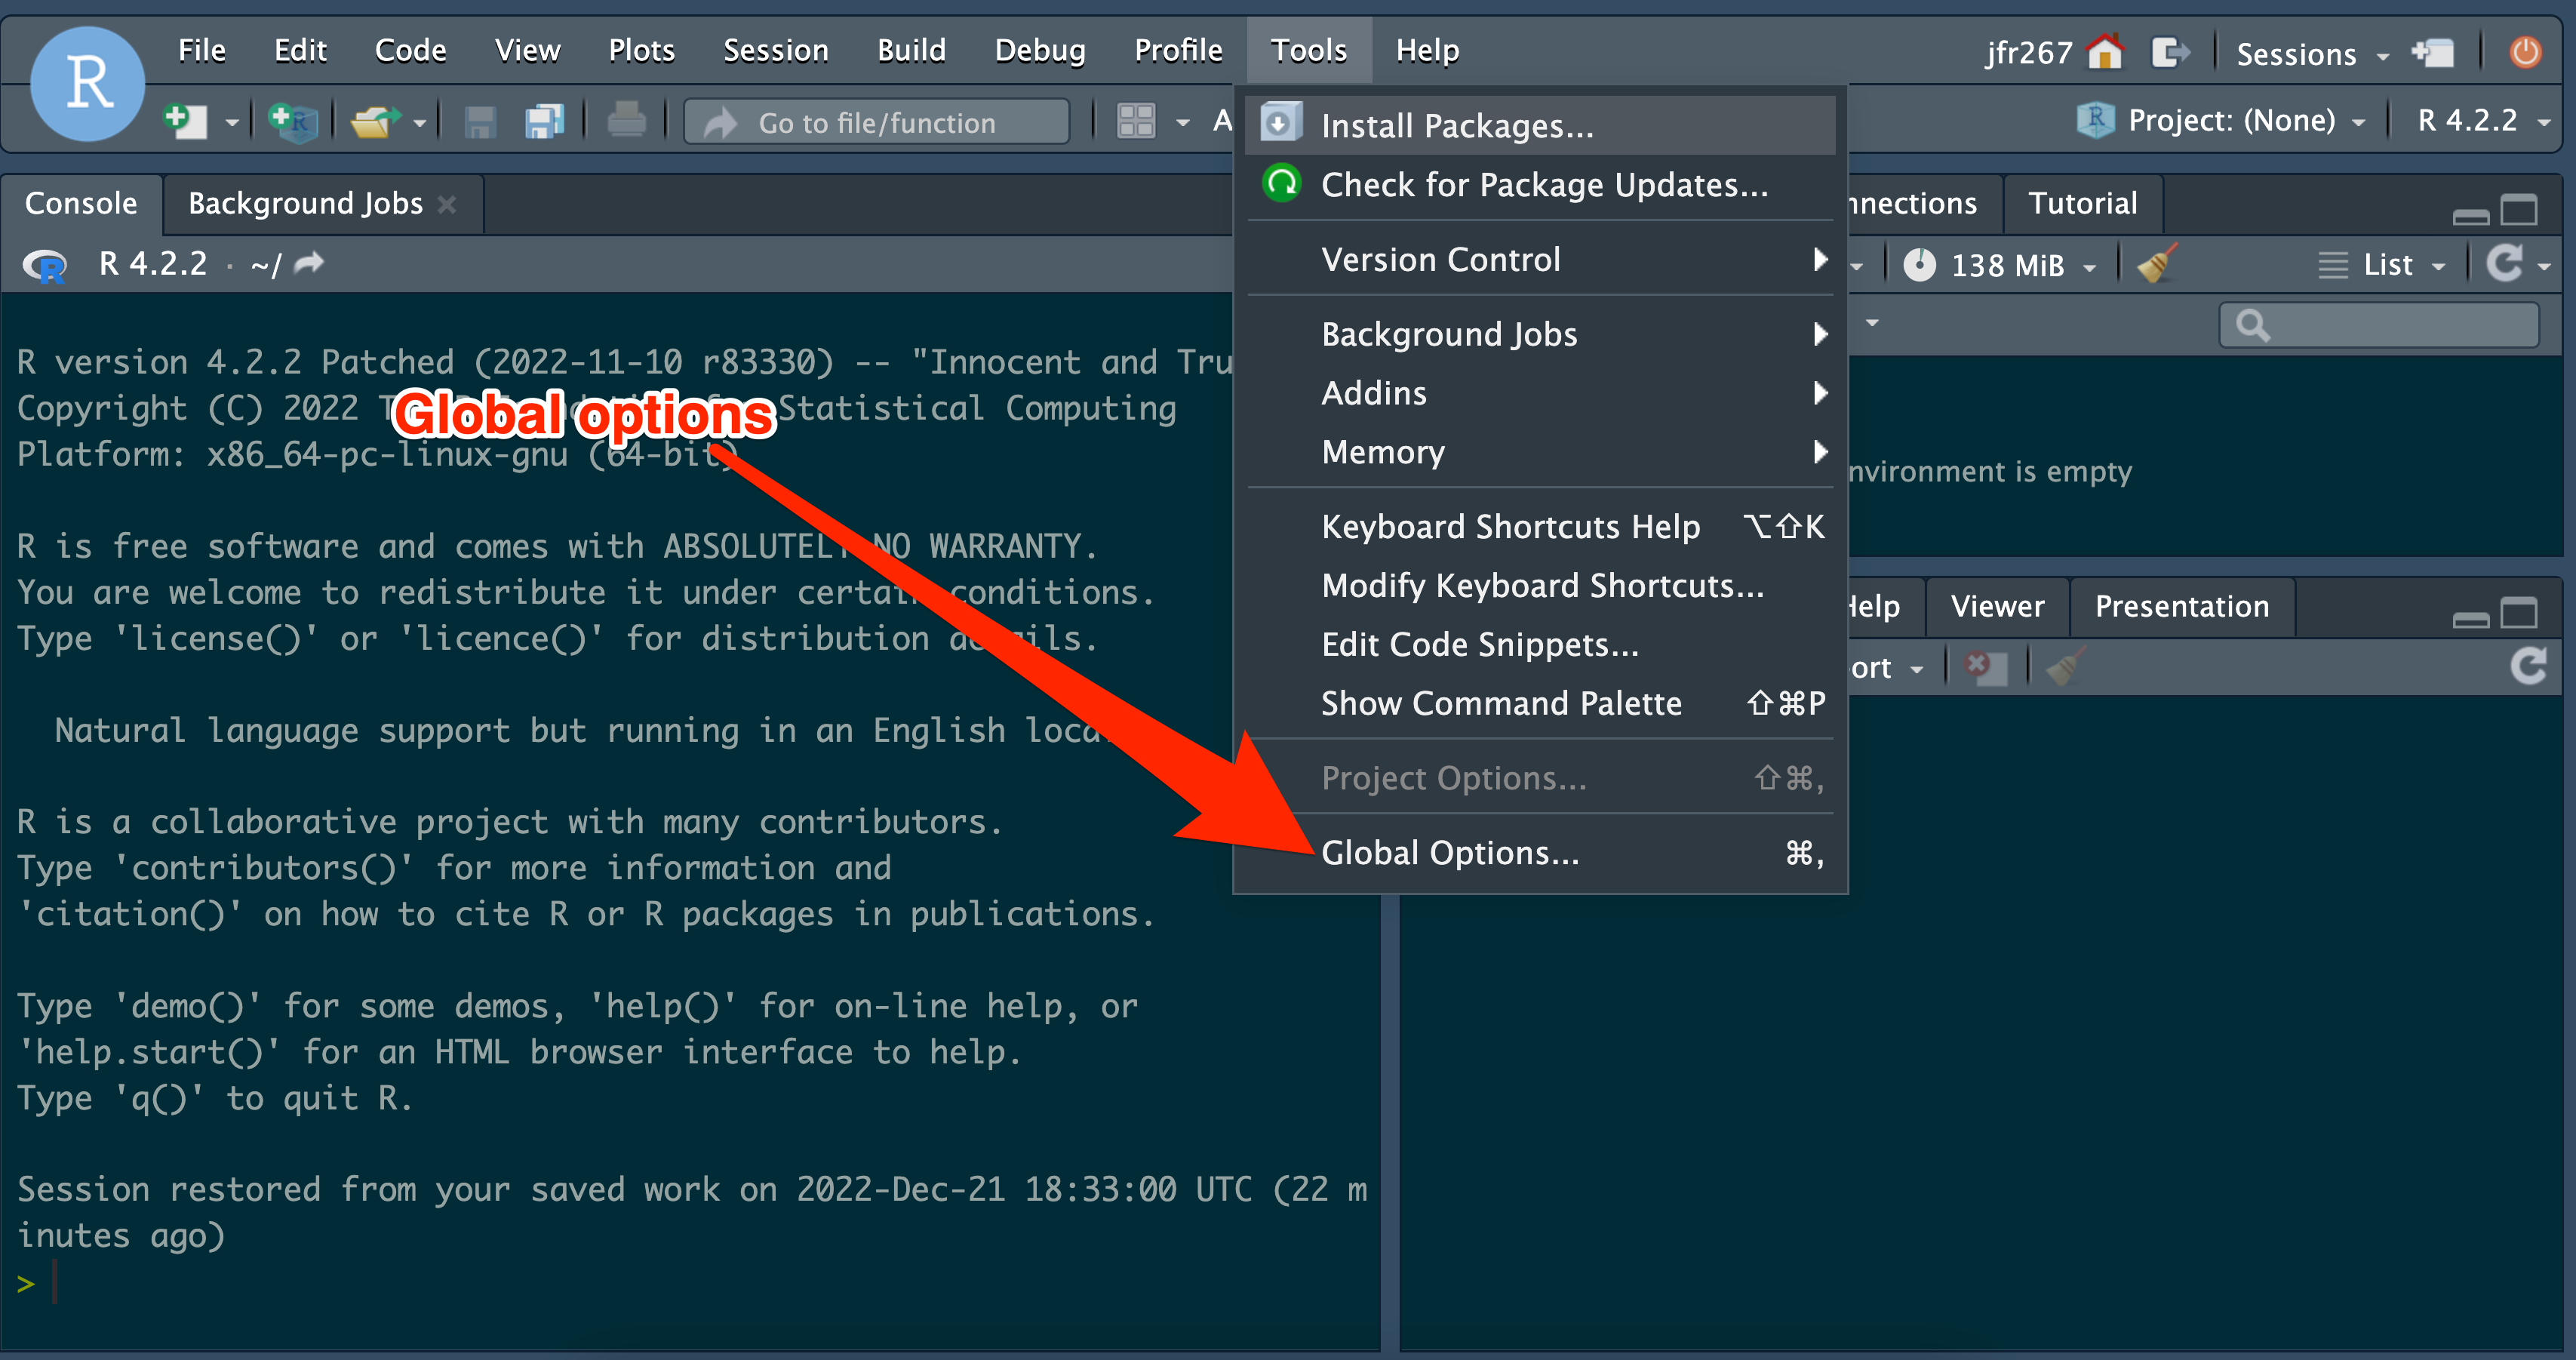
The Tools menu, then Global Options
- Then Go To:
-
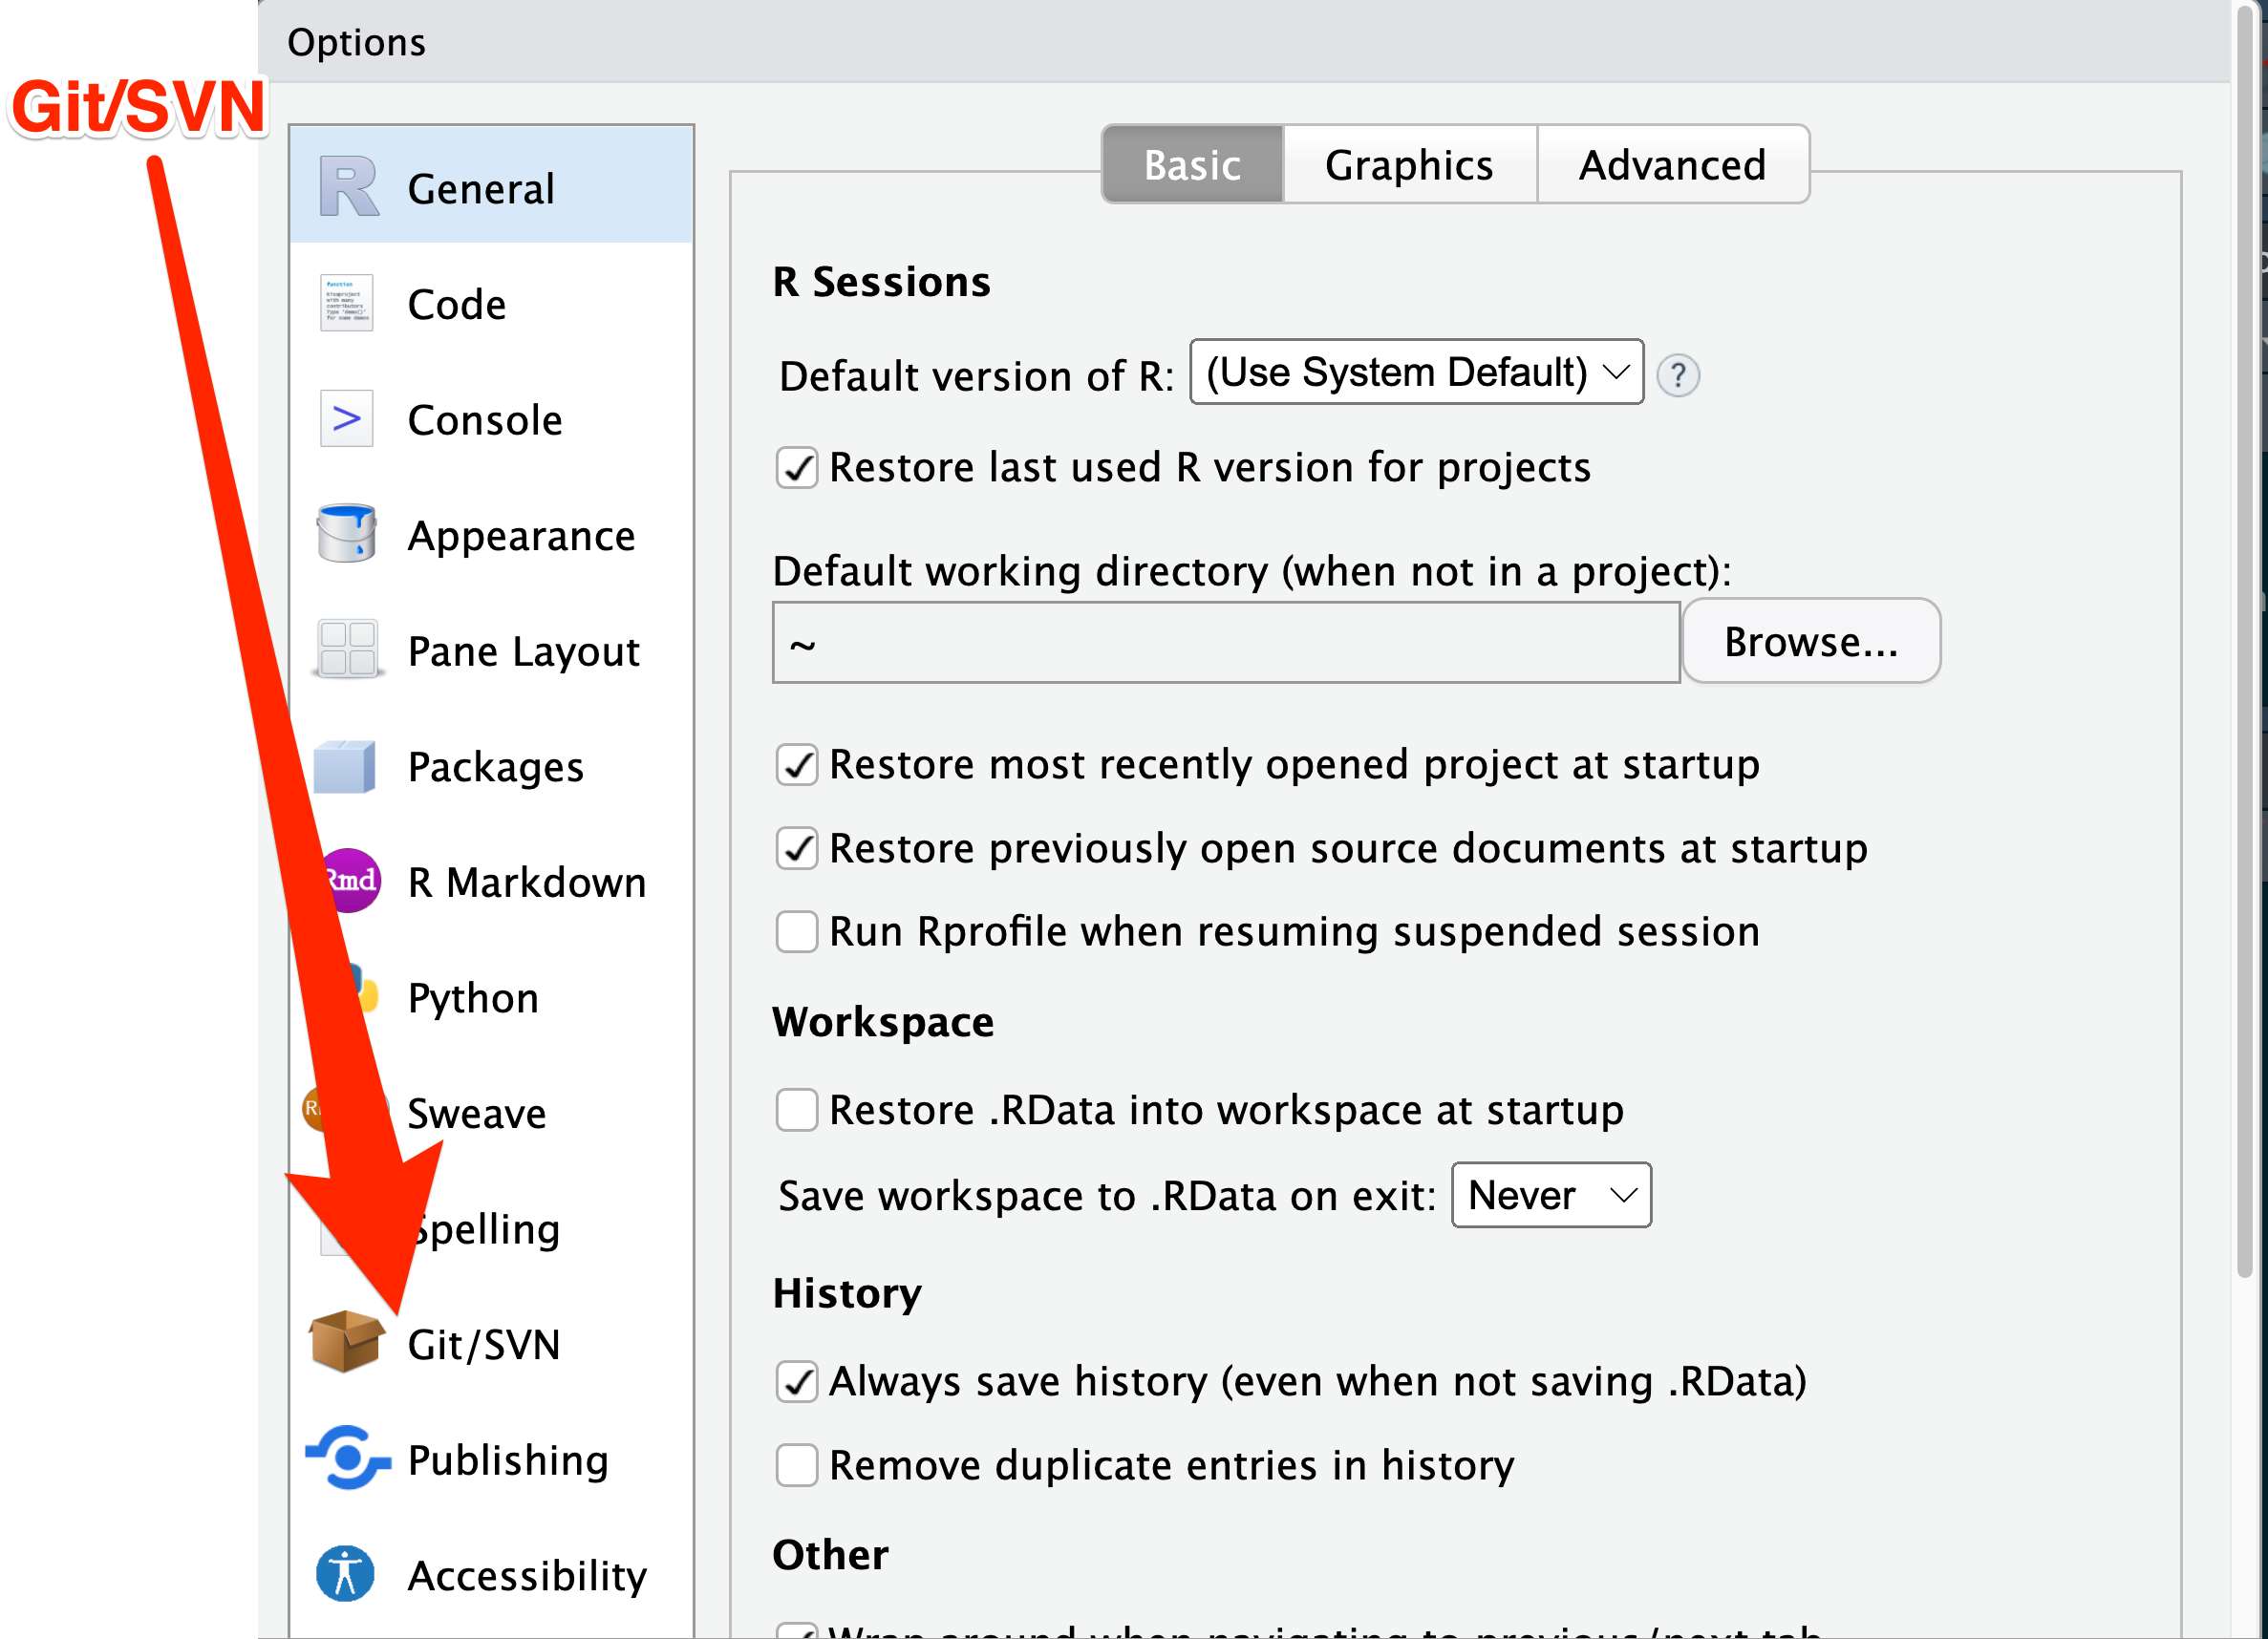
Git/SVN from the left hand side option selector. Its icon is a cardboard box
- Then Go To
-
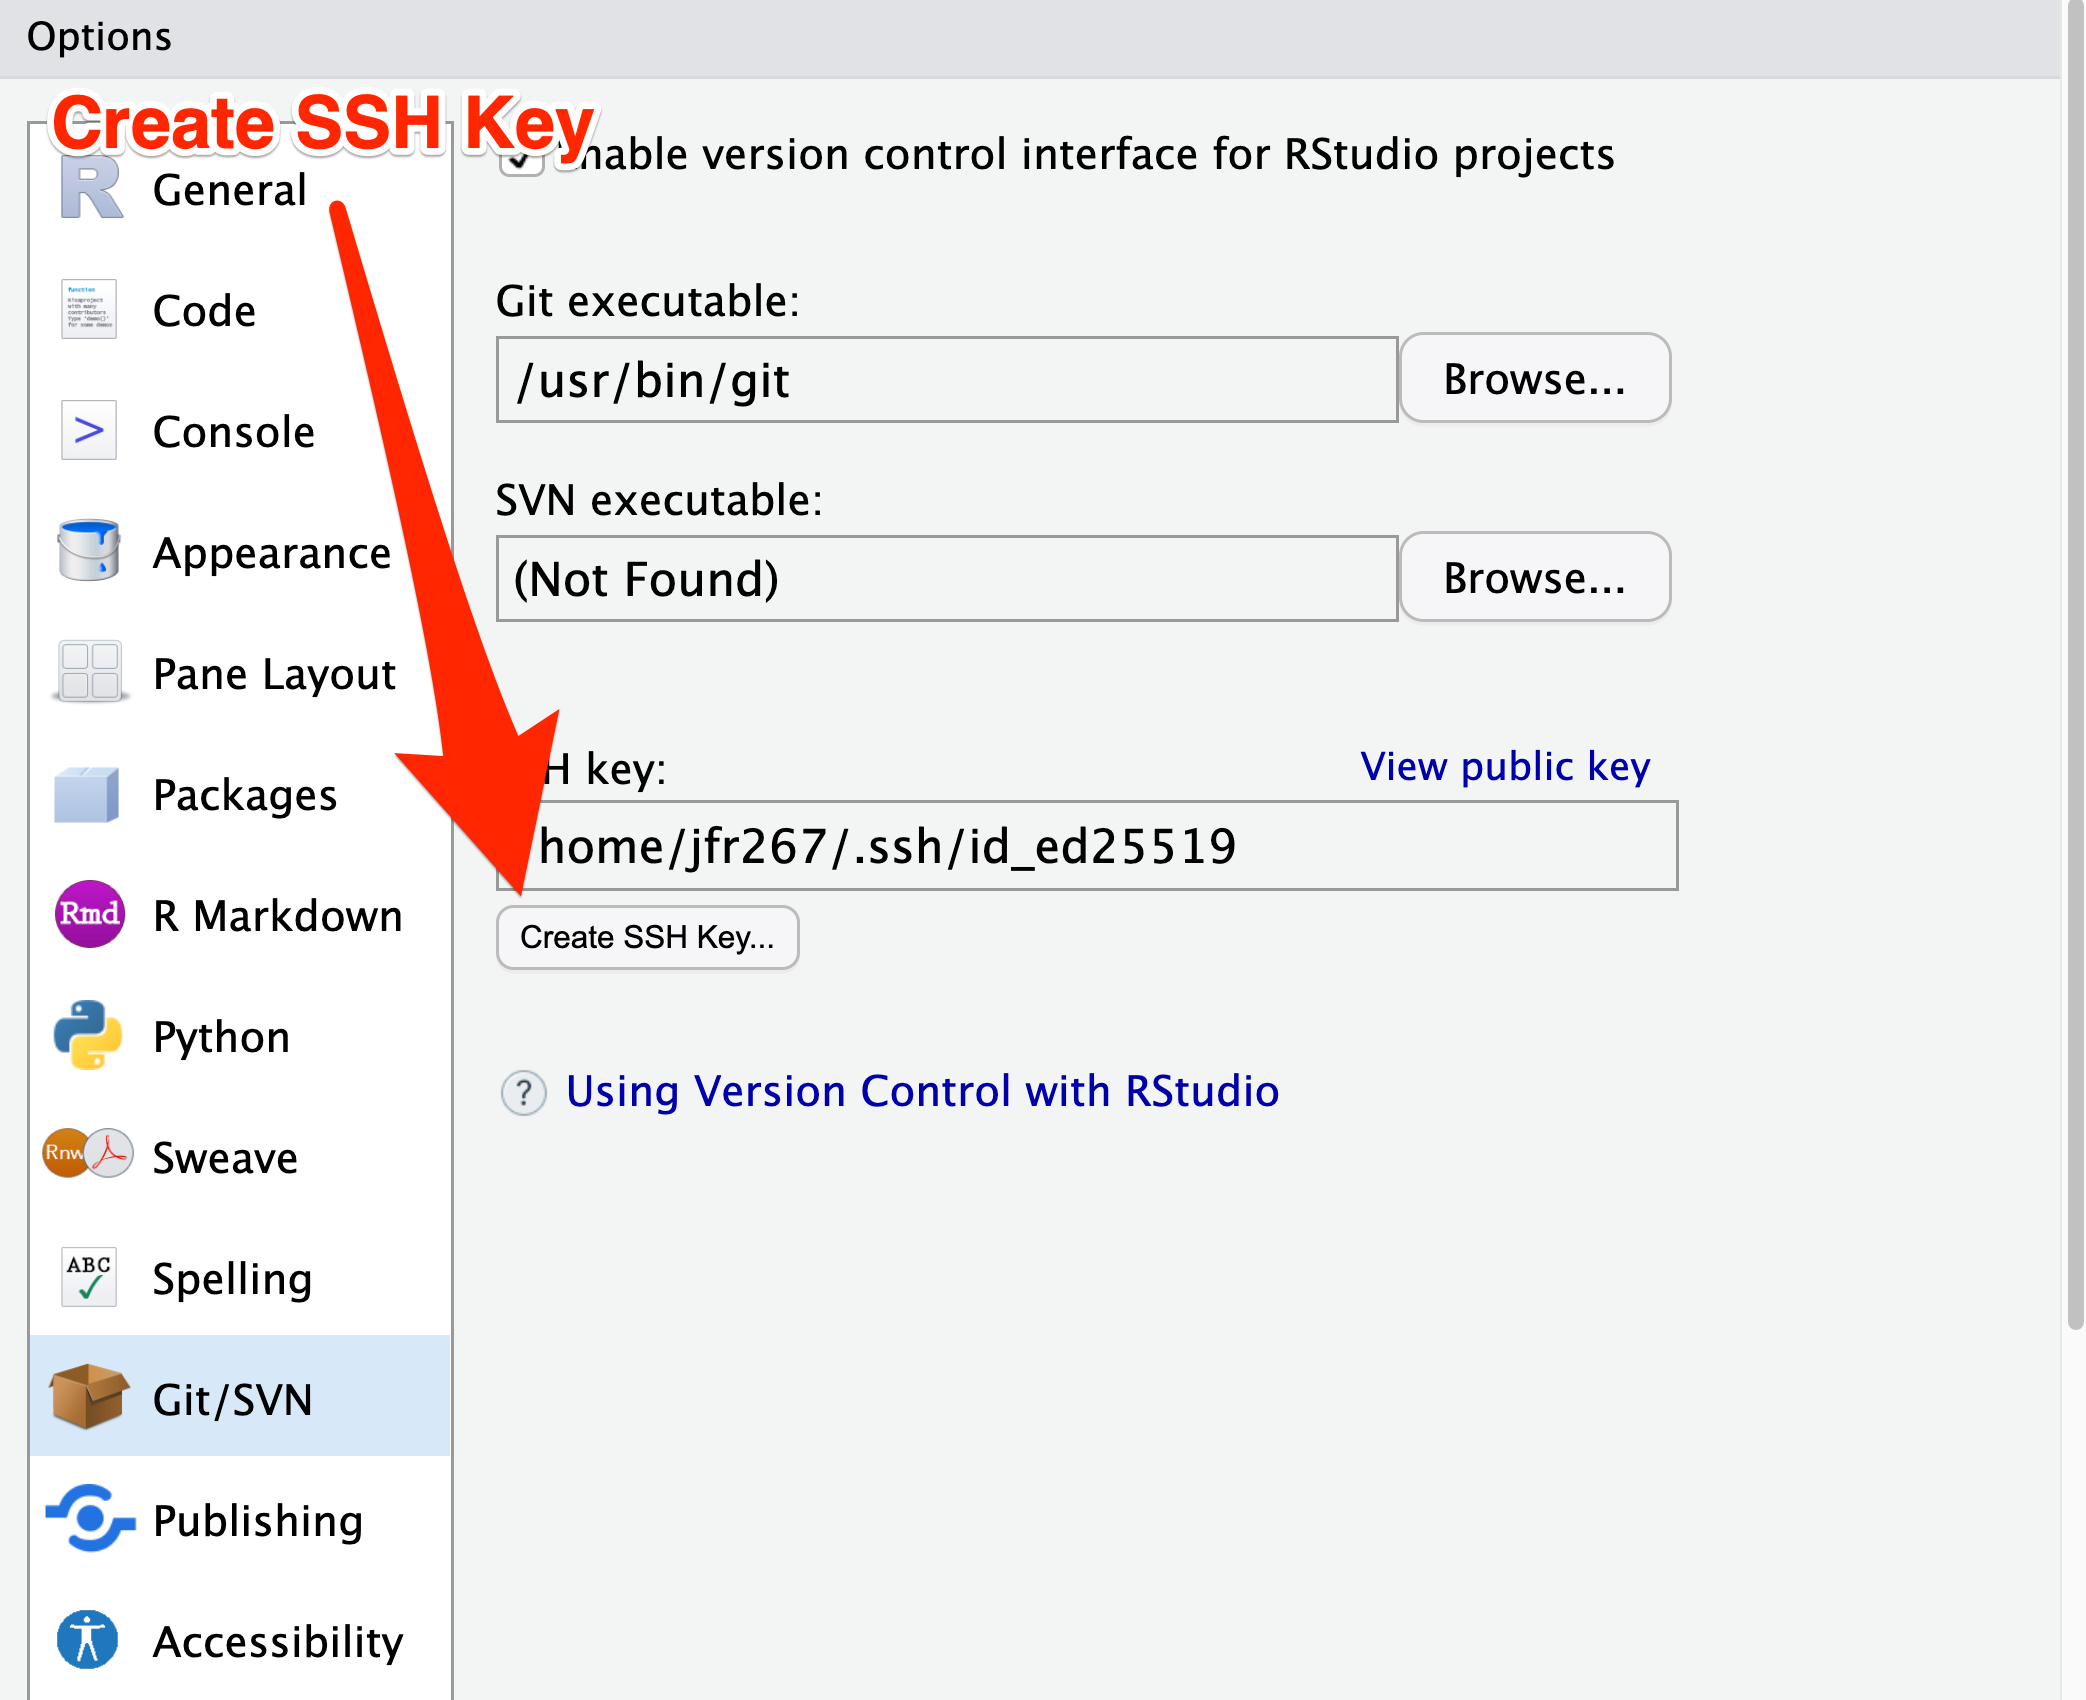
Create SSH Key
- Then
-
The default options should be fine to use. The passphrase here is for the ssh key. It should not be your Github password, or the password for logging into Posit Workbench or Posit Cloud. Once you’re ready, click Create.
- Then
-
After creating the SSH key, you should see the option “View Public Key”. Click on it, and copy the text that appears.
This concludes everything necessary on the RStudio side of things. You should probably keep the session open so that you can come back to re-copy your public key.
Github Configuration
Now, you’ll need to go over to github to add the public key to your profile.
- Go To
-
Your Github Profile Settings
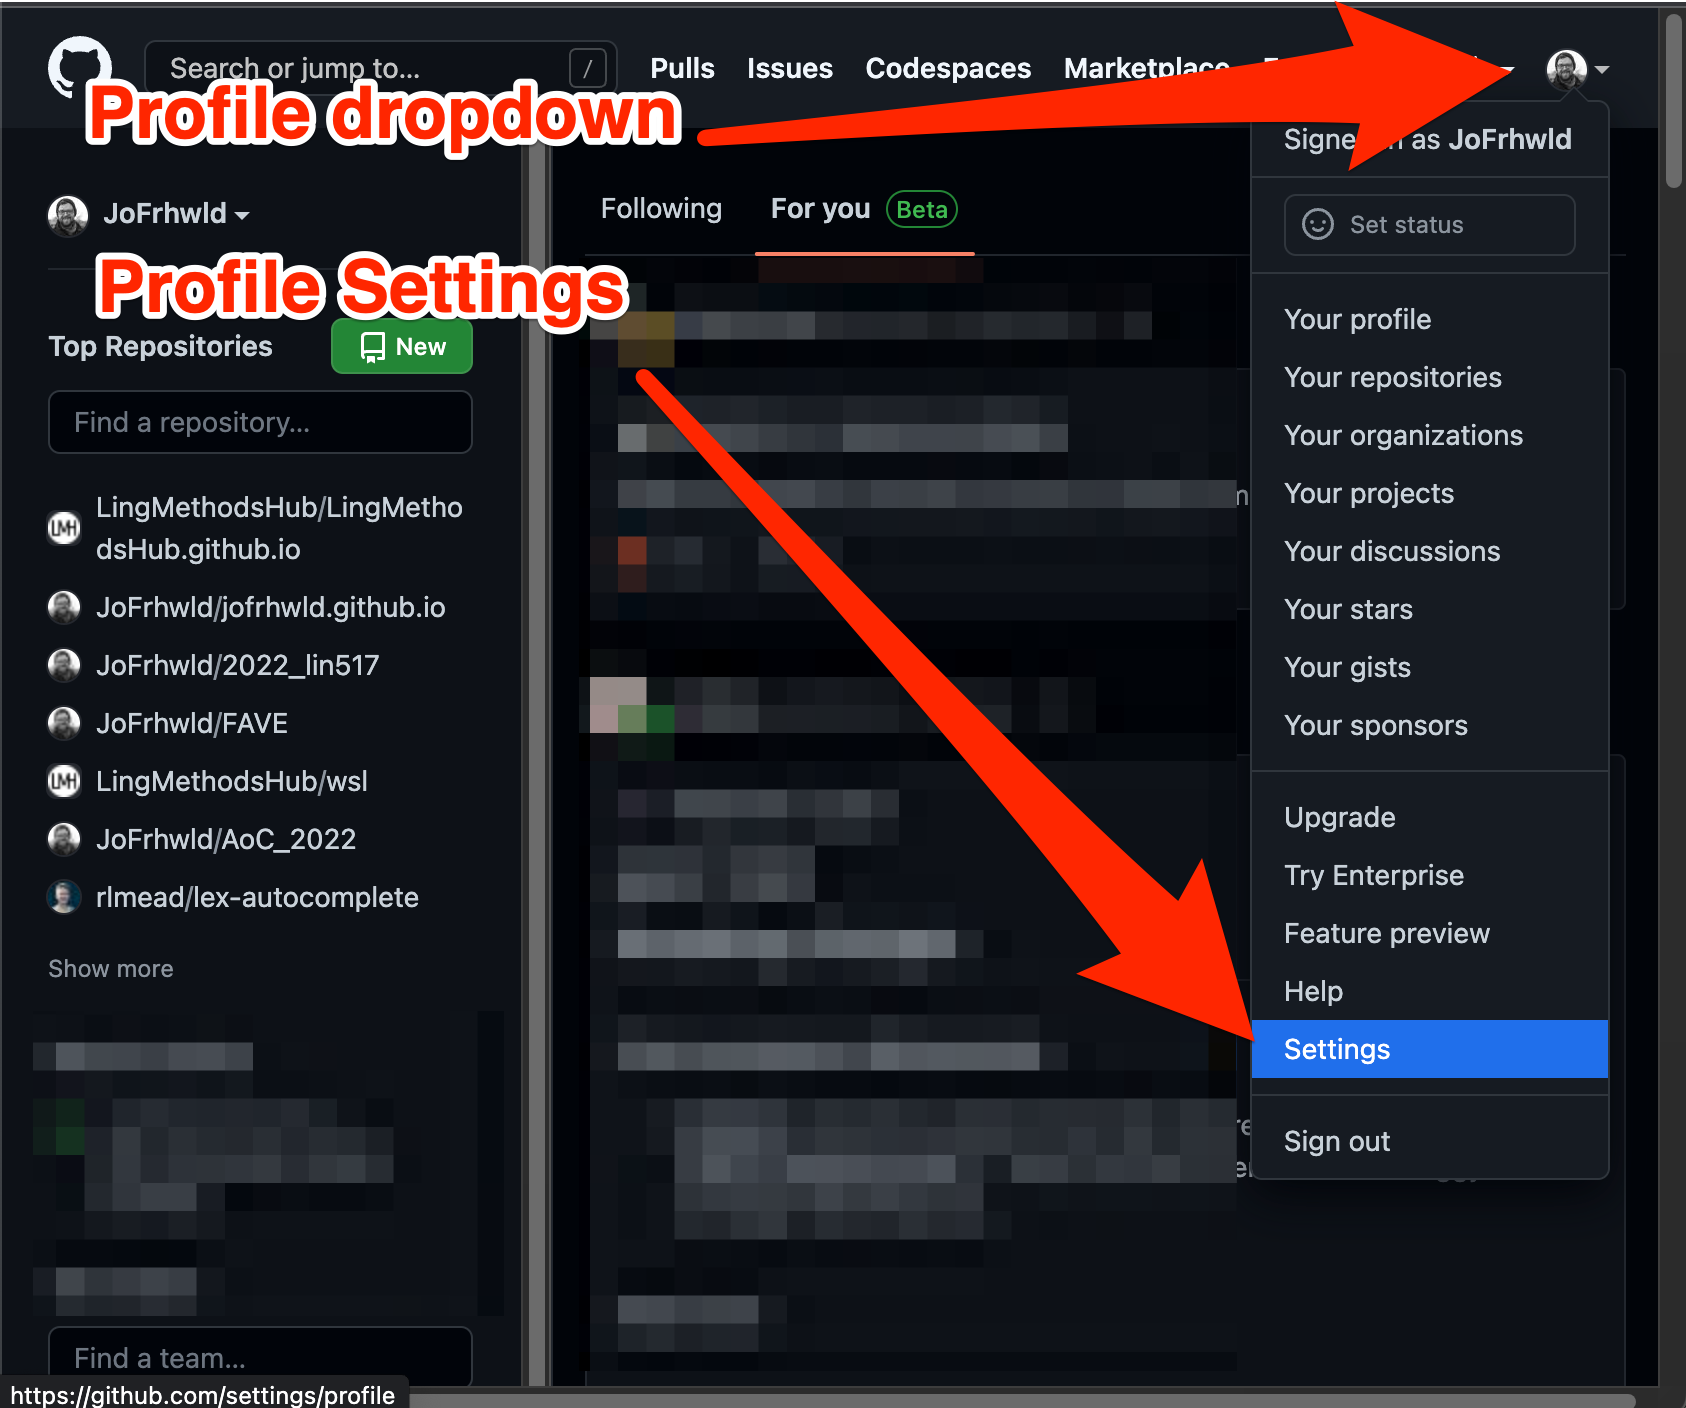
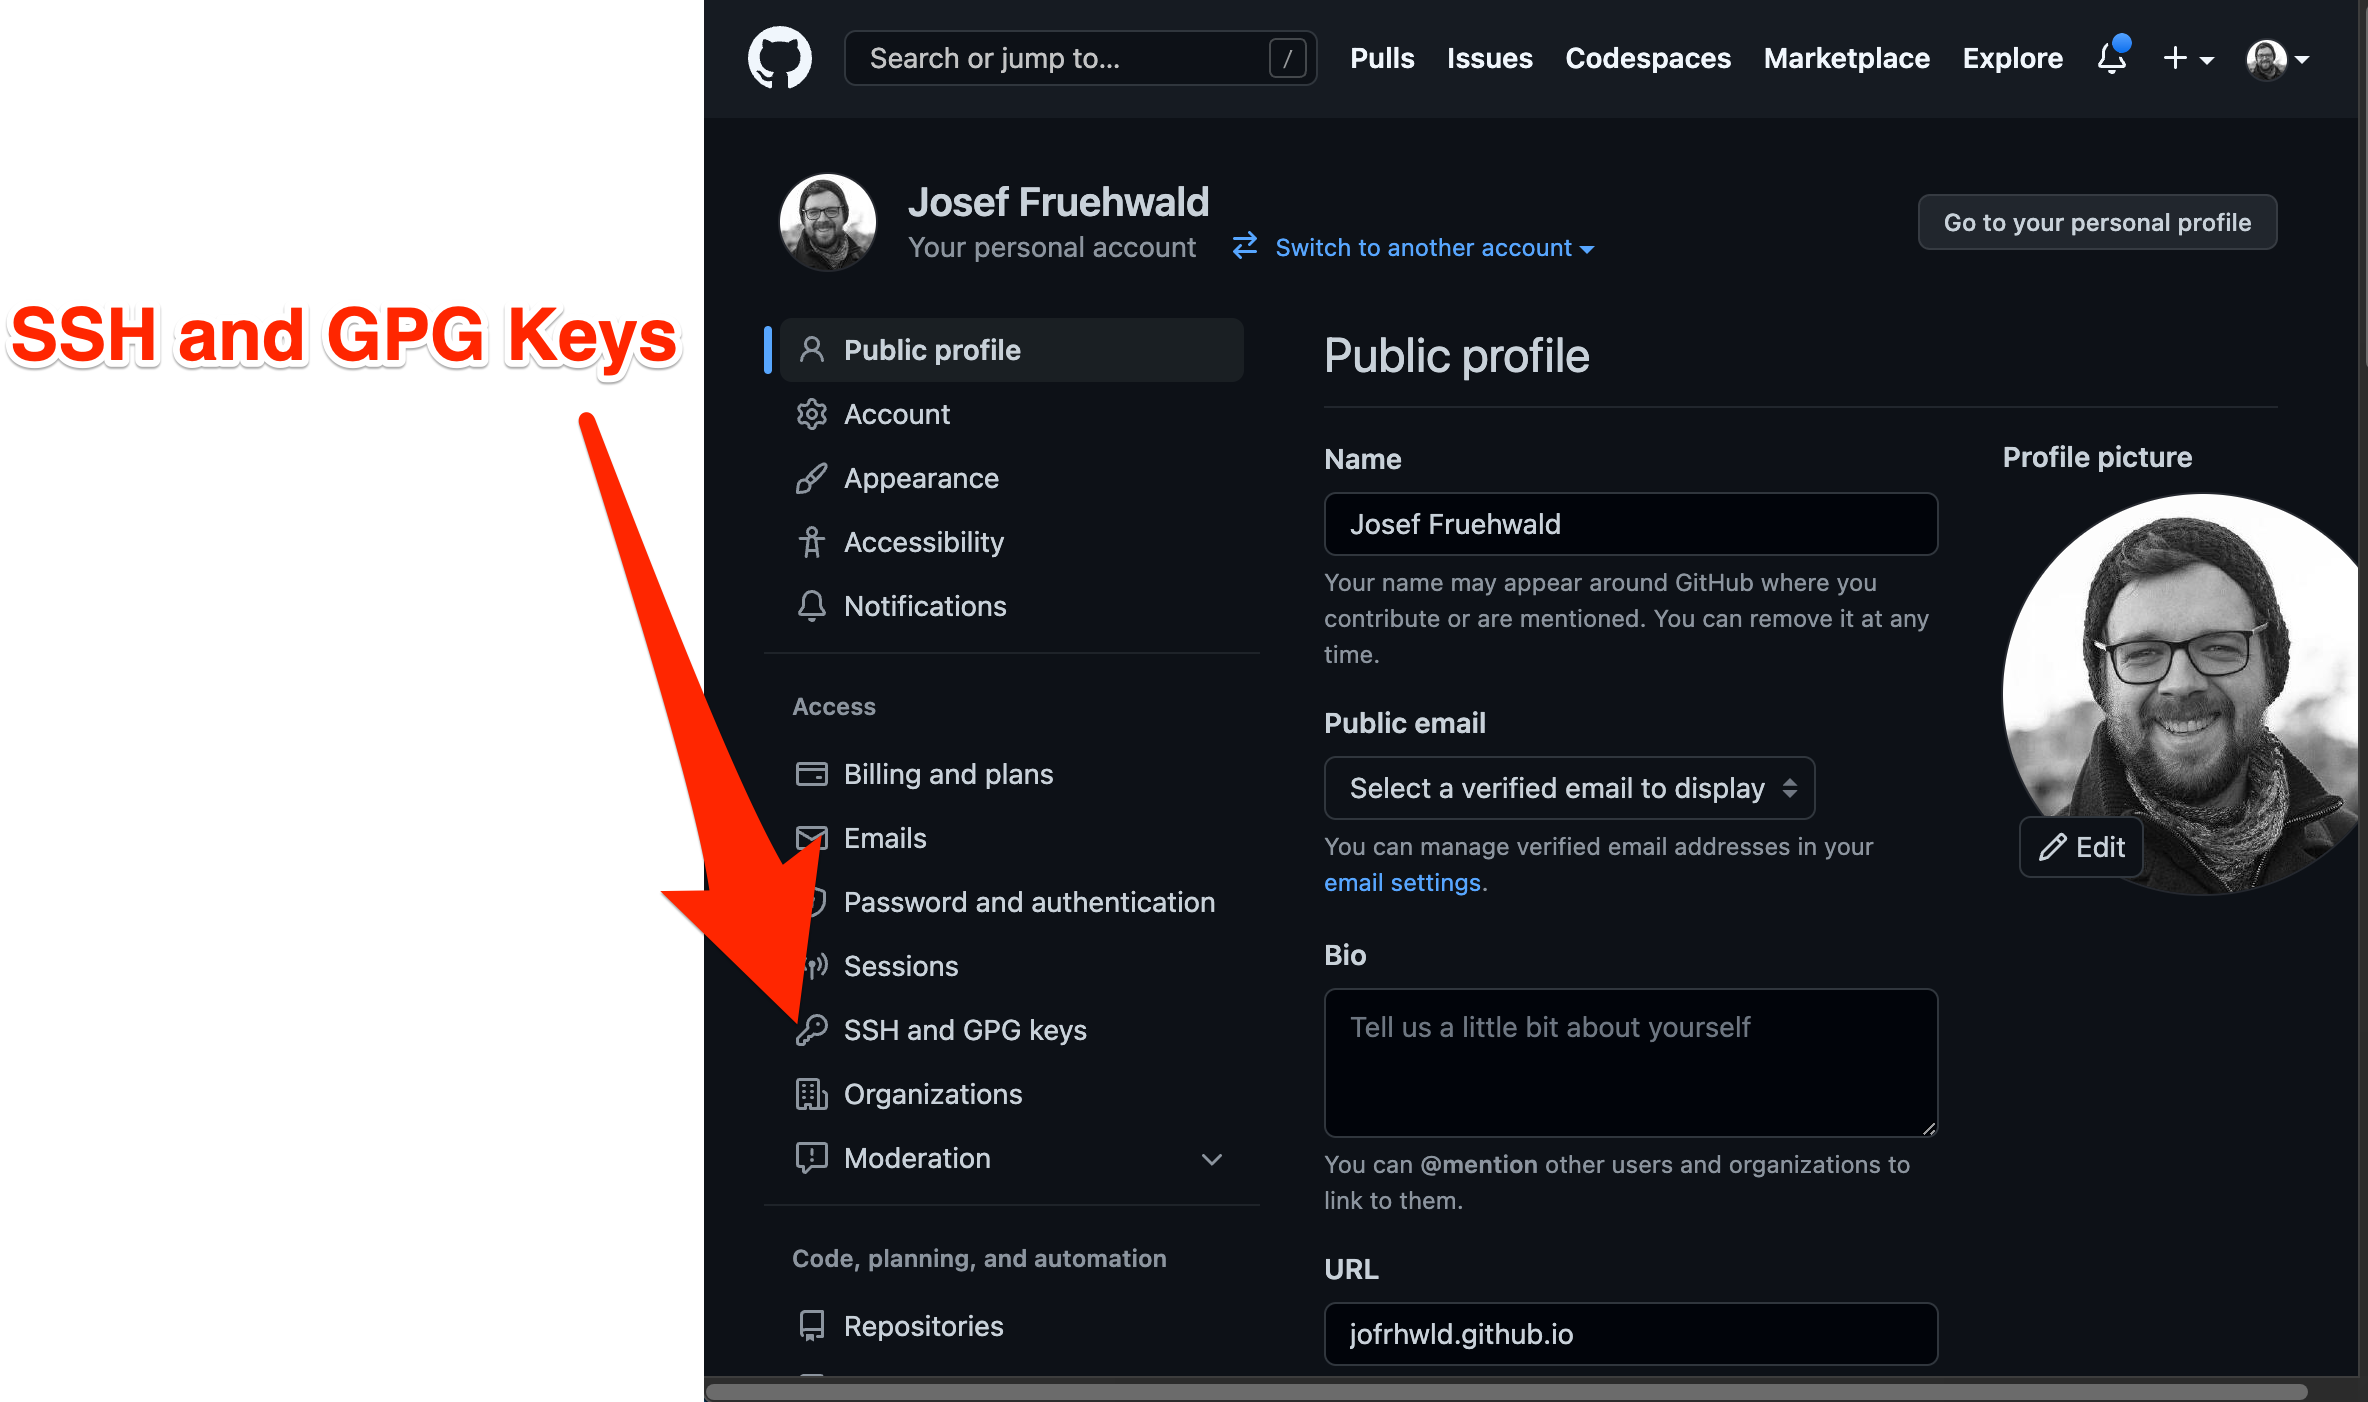
- Then Go To
-
SSH and GPG keys from the left side menu
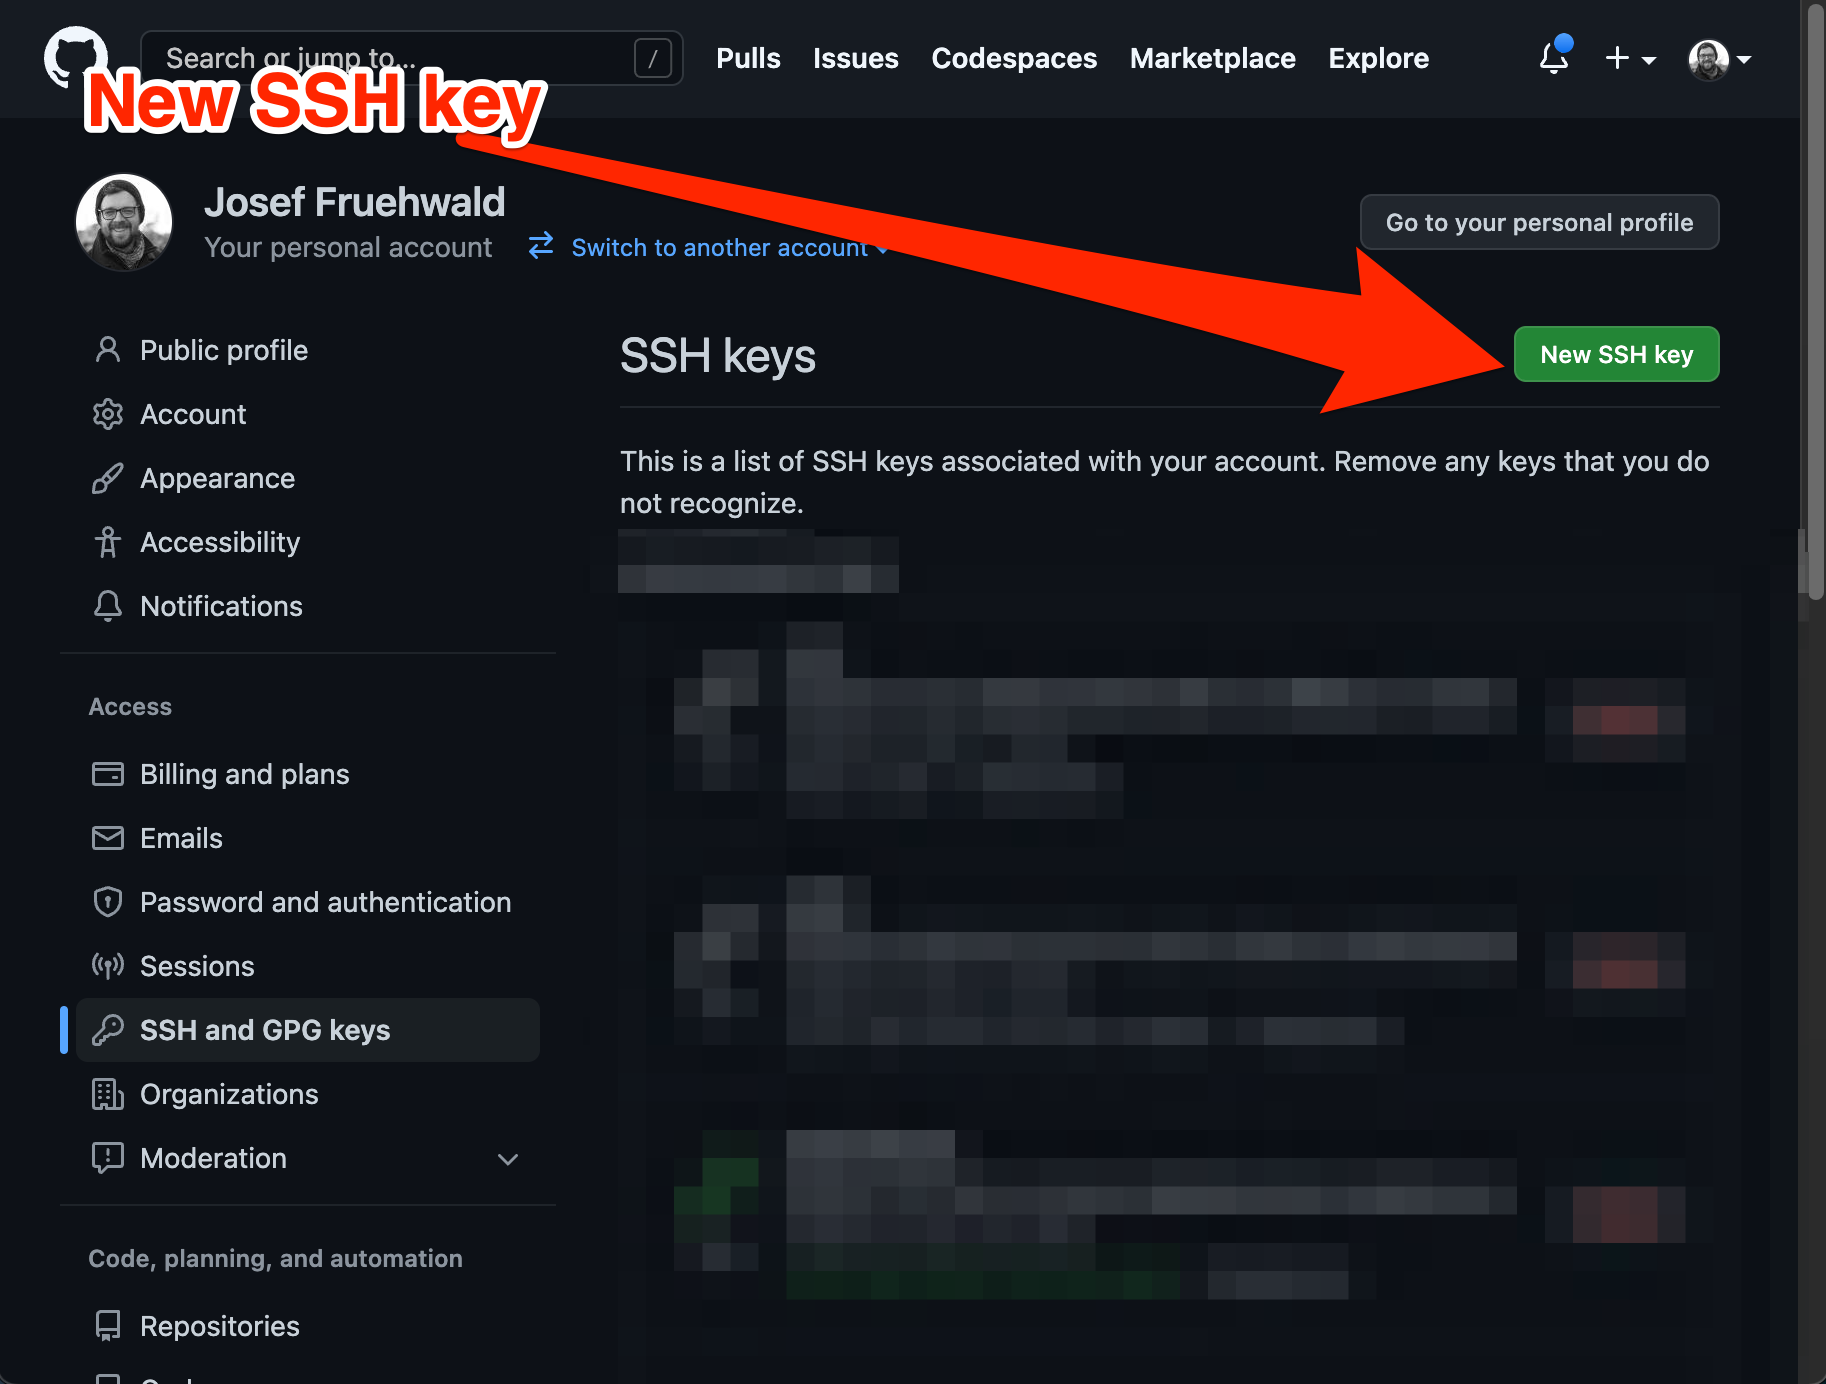
- Then
-
Click on the New SSH key button
- Then
-
Give this key an informative name so you can remember which computer it’s coming from.
- Then
-
Paste the text you copied from RStudio into the Key box and click Add SSH Key.
Configured
Now, wherever you are using RStudio from should be able to push commits to your Github account.